

- Obi-Wan Kenobi Series Synopsis: The Perfect Bridge - August 13, 2023
- Tales of the Jedi Synopsis - August 2, 2023
- Best The Mandalorian Episodes Ranked: This is the Way - August 2, 2023
In this Solo: A Star Wars Story synopsis, I’ll explain why this is such an underrated addition to the franchise. It has some of the most complex characters in the fictional universe (so far) and intertwines them in a web of treachery and deceit balanced with fraternity and trust.
It was important for Solo to paint Han in a good way, showing his origins. However, it couldn’t reconcile him to the Rebellion just yet. In A New Hope, he’s a rogue, money-loving, selfish smuggler who eventually comes back for his friends to save the day. That’s when he really learns his lesson. As such, he can’t become “the ultimate hero” in this film. It would undermine his later redemption.
However, Ron Howard does a fantastic job of making us fall in love with a less-than-perfect anti-hero, showing deeply hidden hints of the roots of the kind character everyone came to know and love.
This is Solo: A Star Wars Story.
Solo: A Star Wars Story Overview
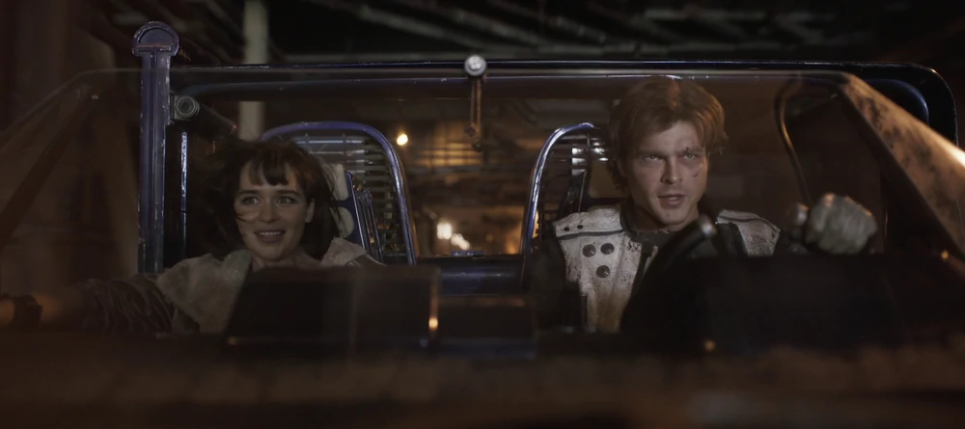
Solo: A Star Wars Story starts with a young Han Solo “carjacking” (“speederjacking”?) what we later learn is an M-62 speeder. Apparently, it’s a very fancy model, far outside the realm of legal purchase for a Corellian street urchin.
Han returns to Lady Proxima’s hideout, where he meets his love interest, Qi’ra, who pulls him aside in the dark for a kiss. Here, he reveals how he’s stolen a small vial of the coaxium he claims he was betrayed over. This is enough to buy their way off-world. Before they can carry out their plan, Proxima’s henchmen arrive. Moloch has no pity for the poor thieves and drags them before an audience and Lady Proxima.
Proxima is a Grindalid – basically, a giant vampire eel. She runs the gang and, thinking Han’s lying to her, orders her men to beat him. He then comes to his feet and throws a rock through the glass window above. Sunlight streams in, instantly burning Proxima’s skin and forcing her to dive straight back down into the cover of water. Han and Qi’ra use this distraction to escape from Moloch, returning to the stolen M-62 and flying off towards Corellia’s spaceport.
Moloch continues to gain on them, and Han opts to force their speeder down a narrow alley to escape. Han and Qi’ra escape to the spaceport. Here, they remain hidden amongst the crowds for some time, but before long, Moloch and the remaining gang members turn up and begin searching through the people. The couple tries to bribe an Imperial officer with the coaxium. While she accepts the bribe and opens the door to allow them through, Qi’ra is grabbed from Han’s grasp before the door closes between them. Han is forced to disguise himself and search for a discrete way out of the spaceport to escape.
He notices a signup desk for the Imperial Academy where he can learn to be a pilot. When asked about his name, he replies, “Han.” Upon learning that Han has no family name, the officer thinks for a moment and lazily types in, “Han… Solo.”
The name and legend are born, and Han heads off to start his life at the Academy.
Mimban Campaign
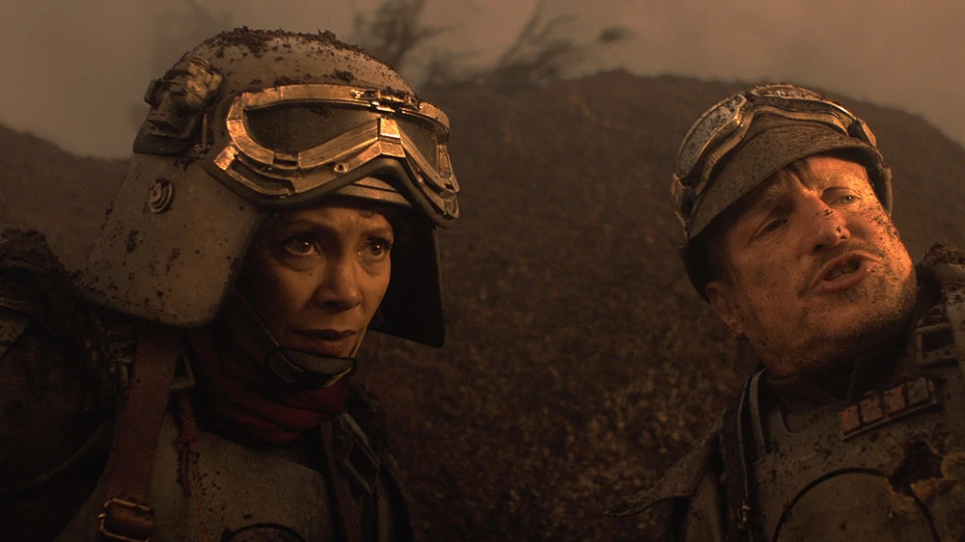
It’s now about three years later. Han is fighting as an infantryman in the Empire’s army. After being kicked out of the Naval Academy, he’s part of a disastrous attack on Mimban, serving in the Imperial ranks as a mudtrooper corporal.
The stormtroopers retreat and regroup under the command of an impressive warrior, “Captain” Tobias Beckett. He suddenly finds himself in charge, much to the amusement of those close to him, and leads the men to victory. Han, impressed by Beckett’s leadership, confronts him after noticing that he’s an imposter wearing the uniform of a dead captain. He knows they’re only there to steal equipment.
Val and Rio, a four-armed Ardennian, join Beckett. Tobias and Val are keen to kill him quietly, but he, disenchanted with the Empire’s aggressive tactics, is determined to join them. He tries to blackmail them into bringing him with them as a pilot. However, they call his bluff and instead hand him over to Lieutenant Bolandin, telling the officer that Han is a deserter.
Han is dragged away to the “beast” with the gang chucking, whom the guards mention they haven’t fed for three days. Han is chained and thrown into a pit, where he’s attacked by a muddy, mistreated, and enraged Wookiee. If you’re familiar with Star Wars, you’ll be unsurprised to find out that this “beast” is, in fact, Chewbacca.
Chewbacca almost kills Han but is shocked to find that his apparent tormentor speaks some basic Shyriiwook, the language of the Wookiees. Together, they come up with a plan to escape, smashing down the supporting strut and killing the guards standing over them.
They climb out of the pit. Han convinces Chewie to accompany him to Beckett’s gang. He knows they’re there to steal an AT hauler, so he follows one when it flies overhead. Although Tobias is frustrated, Rio finds Han’s persistence endearing, so they allow him and Chewbacca on board to help with their heist.
Heist on Vandor
Han soon finds that the plan is to steal a wagonload of hyperfuel refined coaxium from the Empire on the mountainous world of Vandor. They’ll perform a quick strike with Rio piloting the hauler and Val setting the charges on the bridge. Beckett, Han, and Chewbacca will board the train and uncouple the target car at both ends, simultaneously defending it against any Imperial guards. They’ll attach it to the hauler and blow the bridge once Val has escaped, lifting the wagon away and into the sunset.
As they prepare for the operation, the gang asks Han why he’s so keen to return to Corellia. He eventually opens up about “the girl”, Qi’ra, and how he wants to return to rescue her.
Chewbacca mentions how he wants to be free to rescue his family, who have been enslaved. Rio talks about how he likes to be alone as Beckett and Val cozy up together. Beckett tells Han and the newly christened “Chewie” to do what he says tomorrow – and they’ll have more than enough to buy their own ship and earn their freedom.
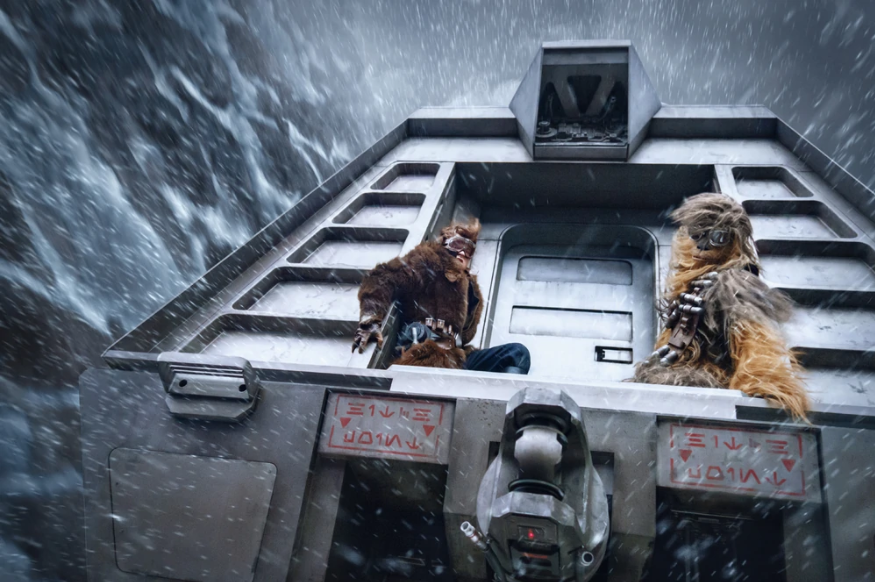
The following day, the operation begins. They’re to be cautious of Enfys Nest and the Ghost Riders, fellow pirates, who could jeopardize the whole job. At first, everything goes off without a hitch. Val plants all the explosives, and Beckett, Han, and Chewie quickly dispatch the stormtroopers guarding the train.
However, things start to go wrong when Nest and the raiders turn up and challenge Beckett’s gang for the prize. They fire harpoons into the side of the coaxium car, and a few riders board the train. One sneaks into the hauler behind Rio and engages in a firefight with the pirate, who badly injured him, forcing him to land the ship on the train. Viper droids are then released from a nearby base to protect the cargo. Val opens fire on them from her exposed position on the bridge as they fly past her, distracting them from their original target.
Meanwhile, Nest and Beckett fight over the dominance of the coaxium wagon. Han makes his way up into the hauler to take control of the ship, and Chewie works on releasing the last coupling.
Val, pinned down by the droids, opts to sacrifice herself to allow the mission’s success. She activates the bombs, ending her own life, but destroying the bridge so the operation can go ahead. At this, Nest returns to their speeder and focuses on their harpoon cables.
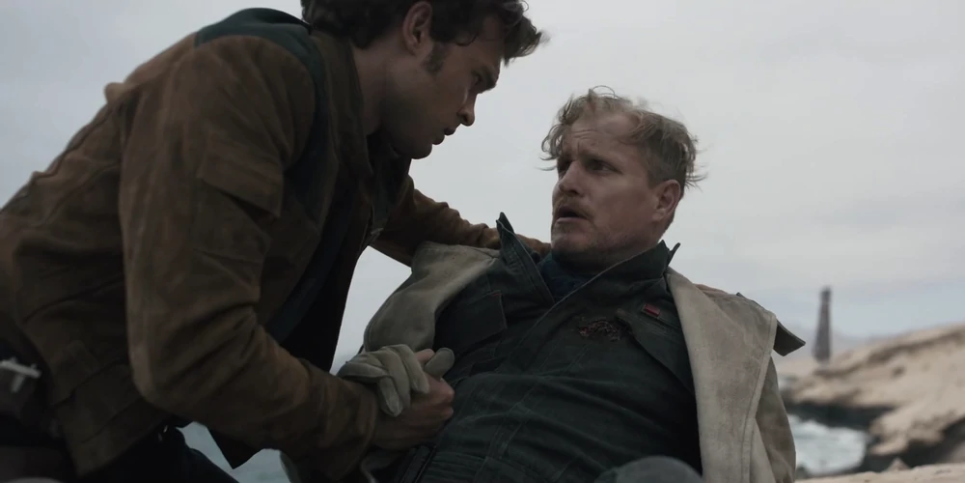
In the cabin, Rio passes away from his injury, telling Han, “It’s no good to die alone, kid.” Chewie releases the last coupling, and the hauler and speeder bikes jointly carry the coaxium-filled car up into the atmosphere. Han is pulling right – Enfys Nest is pulling left. The cargo is likely to crash into a mountainside unless one side lets go. It’s a game of chicken and Han caves first, dropping the coaxium into the mountainside after telling Chewie to grab onto the cable and Bennett. Unable to sustain the weight, Nest also detaches from the shipment. It crashes down into the stone, blowing up the mountain range. She and her riders flee.
Bennett buried his two fallen friends, Val and Rio, before punching Han. He explains that they’re in deep trouble because he didn’t follow orders. Crimson Dawn was their client for that job, and failure means an enforcer squad will be out to kill them. Their only option is to go to the syndicate themselves and try to bargain for their future.
Vermillion
At Crimson Dawn’s fortress/flagship, Vermillion, they surrender their weapons before heading up the turbolift. Bennett tells Han to blend in without talking to anyone directly, but he spies Qi’ra and excitedly greets her. Crimson Dawn sprung her from Corellia, and she’s now a top lieutenant. Han explains how he was just getting some money to go back for her, and she tells him it’s all in the past. They’re back together again.
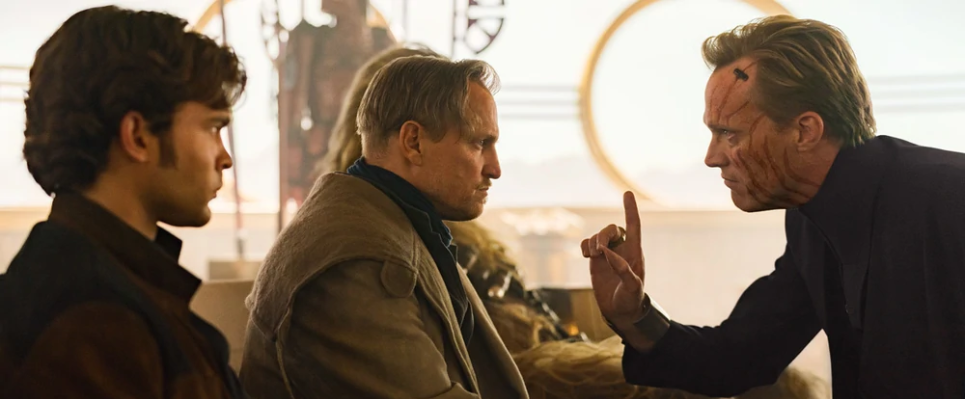
He tells her he’s about to close a massive deal with Dryden Vos, the leader of Crimson Dawn, before Bennett interrupts him, scolding him for not keeping his eyes down. It turns out they all know each other. Vos ominously walks over, greeting Tobias with feigned empathy for Val’s death. He then moves on to Qi’ra.
In their meeting, Dryden asks them to explain why he shouldn’t kill them. Beckett volunteers to steal it from somewhere else, and together the group comes up with a plan. They decide to steal unrefined coaxium from the spice mines or Kessel, owned by the Pyke Syndicate, provided Han, Chewie, and Beckett discount any connections to Crimson Dawn. The plan is “risky”. Raw coaxium begins to destabilize as soon as it’s removed from the vault. They’ll need to take the material to nearby Savareen, where there’s an old unregistered refinery.
Lando Calrissian and the Millennium Falcon
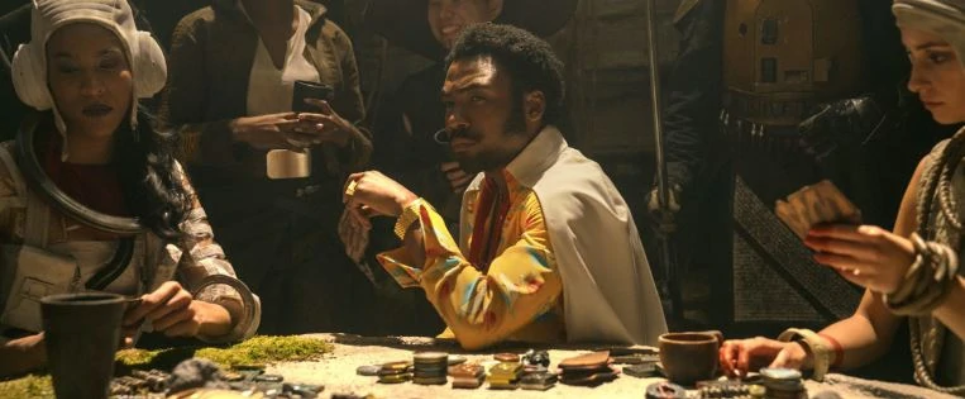
Qi’ra takes Beckett, Han, and Chewbacca to an “attractive” smuggler she knows with a fast ship. Lando Calrissian is introduced as a famous sabacc gambler, and Solo sits at the table. He persuades Calrissian to stake his ship and believes to have won… only for Lando to reveal a “full sabacc”.
Frustrated at losing, Han moves away from the table. Lando finds Han and asks for his payment – which, of course, he doesn’t have. Fortunately, Qi’ra is there to flatter him and offers a cut of the final reward in exchange for his ship’s services. He’s negotiated down to 25% and agrees.
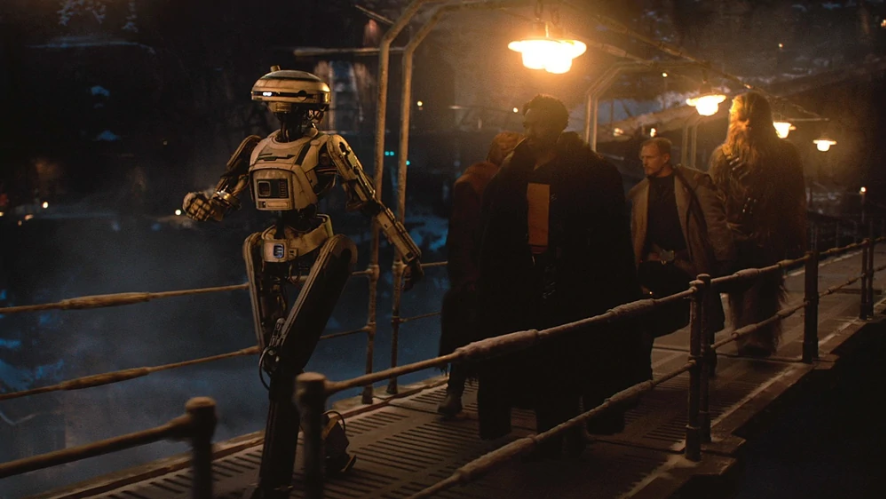
Here, we meet L3-37 – Lando’s enthusiastic droid first mate. She’s all about votes for droids and odd euphemisms. While a somewhat strange (I’m using kind words here) personality, Calrissian keeps her around because of her navigational computer – the best in the galaxy. L3 takes the party to Lando’s ship, the Millennium Falcon. Unbeknownst to them, Enfys Nest has followed them and attached a homing beacon.
Heading off into space, Lando and Han get to know each other better. Tobias teaches Chewbacca about Dejarik, telling him to think a few moves ahead. “People are predictable.” Meanwhile, Qi’ra and Han rekindle their romance before being interrupted by Beckett, who tells him, “You don’t see it because you don’t want to.” A little later, “Assume everyone will betray you, and you’ll never be disappointed.”
“Sounds like a lonely way to live.”
“It’s the only way.”
On Kessel and escaping
After flying through the maelstrom, the Millennium Falcon emerges over Kessel. Beckett reminds everyone to stick to the plan. Han and Chewie are led out in chains and taken as slave samples. The Pyke has them inspected and then invites her, Beckett, and L3 in.
Qi’ra and Tobias eliminate the Pykes and their guards in the control room. L3 releases the droids, creating a distraction. One of the droids presses a button to deactivate all the slave restraints, and they stage a mass breakout. Using this as cover, Han steals the raw coaxium while Chewie, hearing fellow Wookiees, stages a rescue. As they all meet up again outside, they rush the coaxium into the Falcon with the help of Chewbacca’s compatriots. As they’re fending off the Pyke attack through the mass of enslaved beings, L3 is hit and almost completely destroyed.
Lando drags her onto the ship, and they make their escape. L3 is permanently damaged, so they upload her into the mainframe, saving her navigational computer.
They have a somewhat eventful escape, fleeing an Imperial blockade and its TIE Fighters. Tobias gets on the ventral gun to return fire. They decide to escape by doing the impossible: completing the Kessel Run in less than 20 parsecs. They’ll need to take a shortcut through the maelstrom.
“I got a really good feeling about this.” Makes a nice change, Han.
They’re soon approaching The Maw, a gravity well, where they’re chased by some kind of giant space jellyfish intent on eating the Falcon. Han escapes by flying towards the central point of the gravity well and fires the escape pod, tricking the creature into getting sucked in. The Falcon is now stuck, incapable of escaping the pull of gravity, so they put a drop in the fusion reactor, giving them “the kick they need” to get away.
Treachery on Savareen
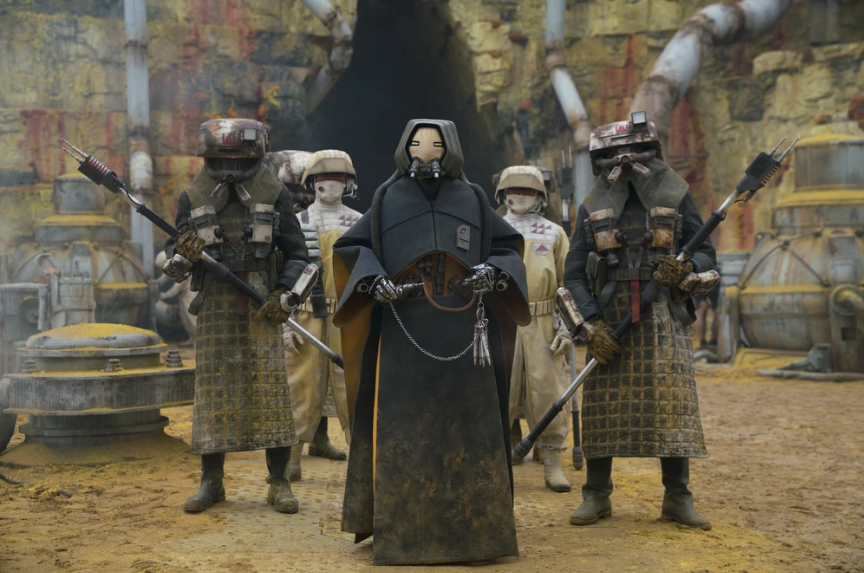
They’re soon arriving on Savareen, the coaxium refinery, where Dryden Vos and Crimson Dawn are due to meet them. Meanwhile, the locals are refining the hyperspace fuel. Suddenly, Enfys Nest and her gang show up as Lando flees in the Falcon. They still want the coaxium.
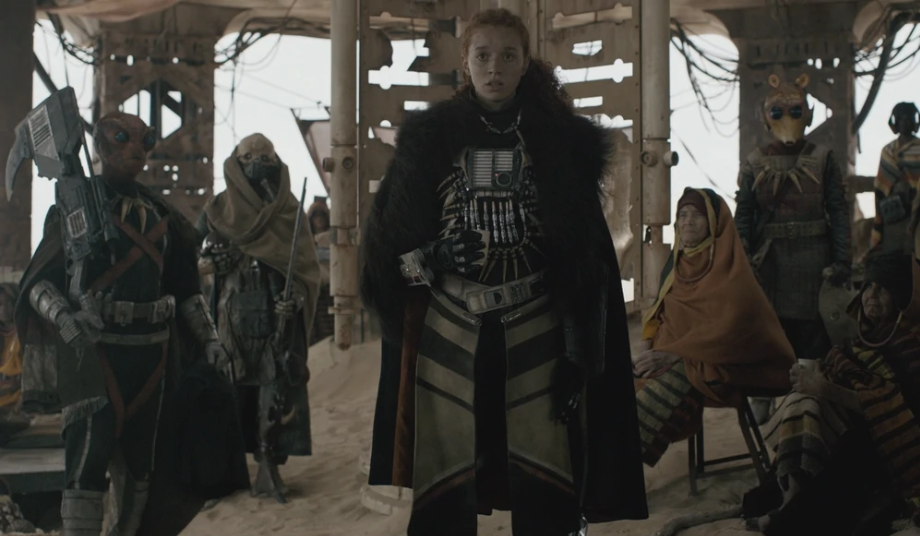
Enfys Nest removes her helmet and reveals that she’s part of a growing alliance against the Empire, trying to persuade them to join her cause. She tells how Crimson Dawn will use the coaxium to fuel innumerable deaths and atrocities.
Han suggests to Beckett that they can’t now hand the coaxium over to Vos. Not because of any good moral cause, but because he doesn’t believe Dryden will let them live. He tries to get Beckett to agree to a plan – a plan we, the audience, aren’t yet aware of – but his friend and mentor refuses. Instead, he chooses to run, hiding from Crimson Dawn as best he can, paying off some debts before finally learning to play the valachord. Han lets him go.
Qi’ra, Han, and Chewbacca head off to the Vermillion to meet with Dryden Vos. They bring with them the refined coaxium.
Dryden welcomes them, again feigning care for their wellbeing. He offers them a snack and, when asking how they’re doing, seems saddened to learn of Beckett’s “death” – the excuse Han gives for his absence. Vos tells Solo to open the case of coaxium when he’s anxious to take payment and leave.
Han carefully hands over the shining blue liquid, and Dryden stares at it in awe. He asks how he did it – made it look so realistic? Solo, visibly nervous, retorts that it is the real thing, to which Vos becomes instantly menacing. He explains that Beckett has already approached him and told him of Han’s plan: give him fake coaxium, hand over the authentic merchandise to Enfys Nest, and disappear before he can be traced. Simultaneously, he rounds on Qi’ra – his “most trusted” advisor – for not telling him of the plan and therefore betraying him.
Tobias walks in, and Han, face distraught, looks at him. “Why?”
Beckett replies that he wasn’t listening. He told him. “Don’t trust anybody.” Han reaches for the gun he smuggled in with the case, but Tobias draws on him too quickly. “It’s too late,” Solo says. “The coaxium is already with Nest.” Unfortunately, Vos and Beckett also anticipated that and sent an enforcer squad to round up and execute the Rebel gang. A moment later, Dryden receives a message from his chief henchman, Aemon, confirming that they have the Ghost Riders at gunpoint and thus have secured the actual hyperspace fuel.
Vos sits Qi’ra down forcefully and asks her to tell him what he should do. She’s betrayed him, even though he trusted her more than anyone else. She shakily replies, “I would want to know why. If it was a moment of weakness or something. And then I would ask that person to prove their loyalty by sacrificing something they love.”
Over in the corner, Beckett tells Han that he warned him about her. Here, Han shows his hand. He smirks. He was listening. He heard Tobias tell Chewie that people are predictable – and he was no exception.
Outside, the enforcers approach Enfys Nest and the Ghost Riders, opening the coaxium canisters to find them empty. They hurriedly radio back to inform Vos, who quickly realizes that the real fuel is what he’s holding after all, before the pirates open up from hiding places, disarming the aggressors.
Beckett promptly shoots the two guards in the room. Ordering Chewie to pack up the coaxium and come with him, he betrays Crimson Dawn and heads off with the Wookiee.
As soon as the doors close, Han, Dryden, and Qi’ra leap for cover. Solo grabs his blaster and opens fire at Vos with his two Kyuzo petars. After a few shots are fired, and some tense negotiation takes place, Han points his blaster at Dryden, only for Qi’ra to show her martial expertise, disarming him and saving Crimson Dawn’s leader. She mutters that she’s sorry.
Qi’ra explains she’s been taught to find and exploit her opponent’s weakness. Instead of executing Han, she turns to Dryden and attacks him, killing him in a few short blows. With Vos lying dead on the floor, she hurriedly tells her old flame to run after Chewbacca, saving him from Beckett. “He needs you, and you’re going to need him, too.” Smiling at her, Han departs with Qi’ra’s parting words: “Go. I’m right behind you.”
But she doesn’t hurry. Coldly, she takes Vos’s ring from his dead fingers and claims his place as leader of Crimson Dawn. With it, she opens a holocommunicator and begins explaining what happened to a cloaked figure – Maul. He is the true leader of Crimson Dawn. She claims Beckett, “the thief”, killed Dryden. Maul knows Tobias couldn’t have slaughtered everyone alone and orders Qi’ra to him on Dathomir, where they will plot what to do with Beckett and his accomplices. He’s no longer interested in the hyperspace fuel but rather in how Qi’ra can help him.
Visibly troubled but happy with the conversation, Qi’ra is on her way to becoming an influential leader of a crime syndicate.
Han intercepts Chewie, Tobias, and the coaxium shipment. Beckett has anticipated everything – Vos being dead, killed at Qi’ra’s hand. He knows she’s a survivor and that she was never interested in the young man she grew up with.
Tobias tells Han he’s nothing like him. “I hope you’re still listening because now I’m going to tell you the most important…” A shot rings out from Solo’s blaster, hitting the infamous thief in the center of his chest. He and Chewbacca are both shocked, and Han runs over to his dying friend. He knew if he didn’t shoot first, Tobias would have killed him.
As he passes away, the engines on Crimson Dawn’s ship power up. Qi’ra slowly pilots down the coastline, watching Han as he returns her gaze before flying past him and up into the atmosphere. She draws a short breath as if to apologize, but nothing will get in her way.
With yet another betrayal on his shoulders, Chewbacca puts his paw around him. Han does at least have one true friend in this galaxy of deceit and treachery. He and his new first mate return the coaxium to Enfys Nest, who transports it to the Rebellion.
“Fair and square”
Just before the end, we return to Lando Calrissian playing sabacc. Han and Chewie storm into his tiny enclave, threatening to rip his arms off. As the smuggler raises his hands in anticipation of a fight, Han notices the card he’s hiding up his sleeve. Laughing, he embraces him, telling him not to worry, before showing that they escaped with about 10,000 credits worth of coaxium – could they possibly use that to buy into his game?
As the game is drawing to its close, Han again goes all in, putting everything on the table for the Falcon. Lando reaches into his sleeve for his “little green sylop,” – but Han pickpocketed it before joining the table. They both show their hands in a fair play, and Solo wins. He and Chewie take the Millennium Falcon and disappear into space, free to go wherever they want.
Key Moments
- 00:55 – Han runs from his tense exchange, stealing coaxium.
- 06:00 – Han and Qi’ra escape Proxima’s lair.
- 10:52 – using the stolen coaxium, they bribe their way off-world. Qi’ra is captured.
- 13:15 – Han signs up with the Imperial Naval Academy and is given the name Han Solo.
- 14:12 – disastrous Mimban Campaign where Han meets Beckett, Rio, Val, and Chewie.
- 26:06 – the plan to steal the coaxium cargo.
- 30:01 – the botched heist, resulting in Rio and Val’s deaths and losing the coaxium.
- 41:57 – Beckett, Han, and Chewie go to Dryden Vos and Crimson Dawn, where they also meet Qi’ra. They formulate a plan to steal raw coaxium from Kessel and refine it on Savareen.
- 52:13 – meeting Lando and engaging his and L3’s services with the Falcon.
- 1:02:39 – Enfys Nest has attached a homing beacon to them.
- 1:10:03 – stealing coaxium at Kessel.
- 1:35:18 – the Falcon lands at Savareen, where the distilling process begins.
- 1:39:17 – Nest and the Ghost Riders arrive, confronting the group. Beckett leaves.
- 1:45:30 – Han, Chewie, and Qi’ra head to Vos to carry out their plan. Tobias betrays them (twice) and makes off with Chewbacca and the coaxium. Qi’ra kills Dryden.
- 1:56:49 – Qi’ra seizes control of Crimson Dawn. Han chases after and kills Beckett, freeing Chewie and returning the coaxium to Nest.
- 2:03:19 – Han and Chewie beat Lando in a card game, “fair and square”, winning the Millennium Falcon.
Conclusion

Solo: A Star Wars Story is actually a fantastic film, in my opinion. It didn’t do too well at the box office, likely due to the sudden influx of too much Star Wars content in one go, but the plot is incredibly well written.
It’s all about relationships and trust with an underlying nod to themes of liberation and freedom. Everything is precisely crafted with well-engineered plot writing – a truly great nod to George Lucas’s franchise.
For example, at the conclusion, it first appears that Qi’ra has betrayed Han. It then emerges that Beckett is the turncoat, and Qi’ra has, in fact, turned her back on Vos. This prompts Tobias to betray Dryden, too, as he steals the coaxium and holds Chewie at gunpoint. Next, Qi’ra, Vos, and Han fight, with Qi’ra seemingly turning on her old flame. However, it turns out she’s just using that as a distraction to attack and kill Dryden. Qi’ra then sends Han off to rescue Chewie and betrays him by flying to Dathomir to join Maul. Finally, Tobias plans to stab Han in the back by shooting him during their conversation before the young man anticipates him and shoots first.
Shooting first is sometimes vital, as die-hard New Hope fans (myself included) are very sure about.
It’s so unashamedly complex, yet the film portrays these cyclical backstabbings and double-, triple-, and quadruple-lies simply, making them relatively easy for the audience to understand.
It’s also worth talking about loneliness and how Solo: A Star Wars Story addresses it. Han wants to be with Qi’ra, but circumstances force him to be alone. He has no people. He’s a street orphan. He’s “Han… Solo.” When Rio dies, he tells him it’s no good to be alone.
Therefore, when he eventually finds Qi’ra again, he’s determined to bring her with him. He misses all the signs and direct insight from Beckett as he tries to force the situation into what he wants. In the end, Qi’ra is a committed member of Crimson Dawn. That’s how she survived. She’s not interested in anything else. While she has no ill feelings toward Han, he certainly won’t be allowed to get in her way.
In the end, Han’s only friend is Chewbacca, who always has his back and genuinely cares for him. The message here is about how motives define people. Good people and bad people are made up by what they intend to do and why they intend to do it. In a villainous, cut-throat world, Han has no choice but to play the game – even though everyone recognizes he’s one of the good ones. But he plays it in his own way – and that’s admirable.
Not everything about Solo: A Star Wars Story works, from my point of view. I find the L3 plot somewhat strange and bordering on disturbing, and it probably wasn’t necessary to give a background story to absolutely everything we associate with Han. Nevertheless, I can see what they were going for.
Frequently Asked Questions
Question: Is Solo: A Star Wars Story important?
Answer: Solo: A Star Wars Story adds quite a lot to the background of Han Solo and Chewbacca. We learn where he gets his golden dice, meets Chewie and Lando, gets the Falcon, earns his blaster, and why he’s such a good pilot. Most importantly, we see the treacherous world in which he lives, explaining why he acts the way he does.
Solo: A Star Wars Story doesn’t have too much impact on the wider Skywalker arc, so it’s not critically essential. However, it’s well worth watching as a standalone film or if you love Han Solo.
Question: What happens to Qi’ra after Solo: A Star Wars Story?
Answer: Although Emilia Clarke has yet to reprise the live-action role of Qi’ra, her actions after Solo have been explored in great depths in canonical comic books. Her various exploits are detailed here, and there’s actually quite a lot of content.
In summary, Qi’ra, having killed Dryden Vos to take control of Crimson Dawn (and save Han as a secondary benefit), joins forces with Maul. The crime syndicate then goes from strength to strength. When Obi-Wan Kenobi finally kills Maul, she takes complete control and regularly pits the Empire against the powerful crime families. She even temporarily steals Han Solo’s carbon-frozen body, putting her in Boba Fett’s bad books.
Qi’ra’s story is ongoing, but she’s planning to overthrow Darth Vader and the Emperor just before the Empire’s collapse. Of course, we know she’ll fail… but how badly? For now, that’s anyone’s guess.
Question: What year is Solo: A Star Wars Story?
Answer: You can work out a timeline through Chewbacca’s age. He’s 190 when Han meets him in the film and is born in 200 BBY. Some basic mental maths means the bulk of Solo: A Star Wars Story takes place in 10 BBY.
However, the film begins three years earlier, when Han and Qi’ra are on Correlia. Therefore, the first couple of scenes are set in the year 13 BBY.